Your First Project - Hello World
For your first project, we will do the classic "Hello world" example. This tutorial is more for learning how the development tools works.
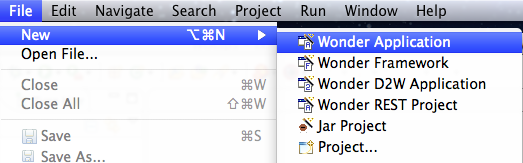
First, we will create a new Wonder Application. In Eclipse, open the File menu, select New and select Wonder Application.
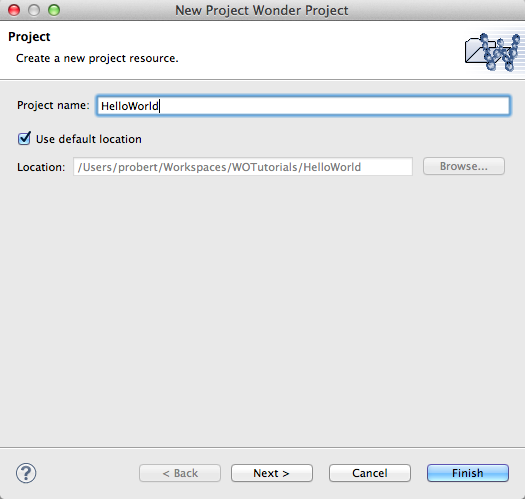
The project wizard will ask for the project name. Enter HelloWorld. Click Finish.
The project have been created, you will see it in the WO Explorer tab. Expand it (click on the triangle next to the project name) and you will see the following folders:
- Sources: this folder holds all of your Java source code. When you create a new project, that folder have 4 files: Application.java, Session.java, DirectAction.java and Main.java.
- JRE System Library: don't touch this.
- Components: this folder holds all of your Project Wonder components.
- Libraries: if you have JARs, for example JDBC drivers, that you need for your project, put them in there.
- Resources: that folder is for Project Wonder-specific files. A Properties file is added by default.
- WebServerResources: that folder is for "static" content that you use in your components, be it images, CSS or JavaScript files.
- woproject: this folder holds 6 files that the Ant builder use to include or exclude files and folders in the build product. 99% of the time, you don't need to customize those files.
- build.xml: This is the XML file to build the project with Ant. Note that this is to build a "product", when you run the project in Eclipse, it use the incremental builder instead of Ant.
So let's run the project. Expand the Sources folder, expand the your.app package, right-click on Application.java and select Run As -> WOApplication. This action will start the project and it will create a run configuration for Eclipse.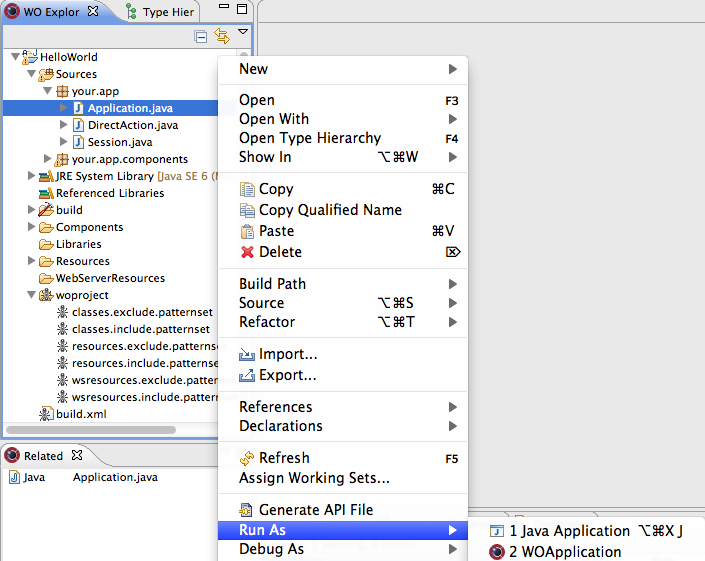
After a couple of seconds, the project will be started and a page will open in your favorite browser. You just ran your first Project Wonder application, congratulations!
Now, let's make the "Hello World" to be dynamic. If the HelloWorld application is still running, terminate it by clicking on the square red button in the Console tab.
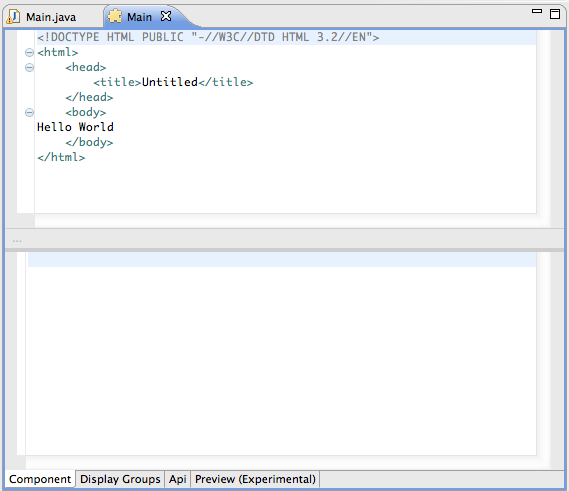
In the project, open the Sources folder, open the your.app.components package and open Main.java. Main.java is the Java part of a Project Wonder component. If you check the content of the Related tab, you will see that Main.java is related to other files like Main.wo and Main.api, it's a good way to find out if a Java class is part of a component.

In the Main.java editor tab, you will need to put one variable + one setter + one getter. Complete code:
public String myTextForDisplay() {
return myTextForDisplay;
}
public void setMyTextForDisplay(String myTextForDisplay) {
this.myTextForDisplay = myTextForDisplay;
}
Save the file.
So now we have a variable to display the content of a string. The next step is to open the HTML part of the component to actually display the string. In the Related view, double-click on the Main.wo file. This action will open the component in the Component Editor.
Remove the Hello World text from the HTML and replace it with:
And save your modifications. You are now ready to run the application again. The first time you ran the application, it created a run configuration inside Eclipse, so to run the application again, click on the green circle with a white arrow in the toolbar, and select HelloWorld.

The application is now displaying the string for the Java variable! You can terminate the application.
Final step: making the string truly variable by having a small text field to update the string. To do so, go back into the Main component editor view and just after the <wo:str call, add:
<br />
<wo:form>
<wo:textfield value = "$myTextForDisplay" />
<wo:submit action = "~updateString" />
</wo:form>
Now we have a simple form to update the string. The only thing we need to do is to implement the updateString method. Open the Main.java file and add the following code:
public WOActionResults updateString() {
return null;
}
Run the project again, and update the string in the text field. It's now 100% dynamic! Since we added a setter for the variable a couple of steps before, you don't need to set the string in the updateString method, that's the power of bindings.