Install WOLips with Eclipse Update Manager
Most recent info
For Eclipse 2020-09 and newer, use the following update site: https://jenkins.wocommunity.org/job/WOLips_master/lastSuccessfulBuild/artifact/temp/dist/
Quick Start
Install Eclipse
- WOLips System Requirements:
- Java 1.5 or greater (not Java 1.4)
- WOlips Stable: Eclipse 3.6.1 Classic (32-bit or 64-bit depending on your architecture)
- WOLips Current: Eclipse 3.7 Classic (32-bit or 64-bit depending on your architecture)
Install WOLips Plugin
- WOLips Eclipse plugin Update Site:
- Stable: (For Elipse 3.7/3.8) http://jenkins.wocommunity.org/job/WOLips37Stable/lastSuccessfulBuild/artifact/temp/dist/
- Eclipse 4.2 (juno):http://jenkins.wocommunity.org/job/WOLips42/lastSuccessfulBuild/artifact/temp/dist/ See warning above!
- Eclipse 4.3 (kepler): http://jenkins.wocommunity.org/job/WOLips43/lastSuccessfulBuild/artifact/temp/dist/
- Eclipse 4.4 (luna): https://jenkins.wocommunity.org/job/WOLips44/lastSuccessfulBuild/artifact/temp/dist/
- Eclipse 4.6 (neon): https://jenkins.wocommunity.org/job/WOLips46/lastSuccessfulBuild/artifact/temp/dist/
- Eclipse 4.7 (oxygen): https://jenkins.wocommunity.org/job/WOLips47/lastSuccessfulBuild/artifact/temp/dist/ Seems to also work with Eclipse 4.8 (photon)
Full Details
Install Eclipse
WOLips System Requirements:
- Java 1.5 or greater (not Java 1.4)
- WOLips Current: Eclipse 3.7 Classic (32-bit or 64-bit depending on your architecture)
Launch the Eclipse application.
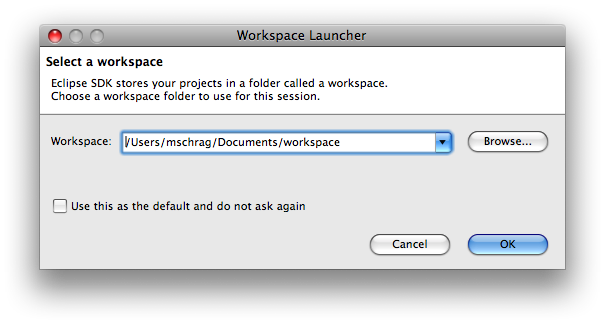
- The first window that will appear on a new installation of Eclipse is the workspace folder selection dialog. Your workspace is the folder that will contain all of your active projects along with the metadata Eclipse requires to maintain the projects.
- Eclipse Welcome Screen
The first time you launch Eclipse, you will be taken to the Welcome screen. You can review the Welcome content if you would like and the tutorials are useful if you are unfamiliar with the platform. When you are finished, select the "Workbench" icon on the right side, as pictured below.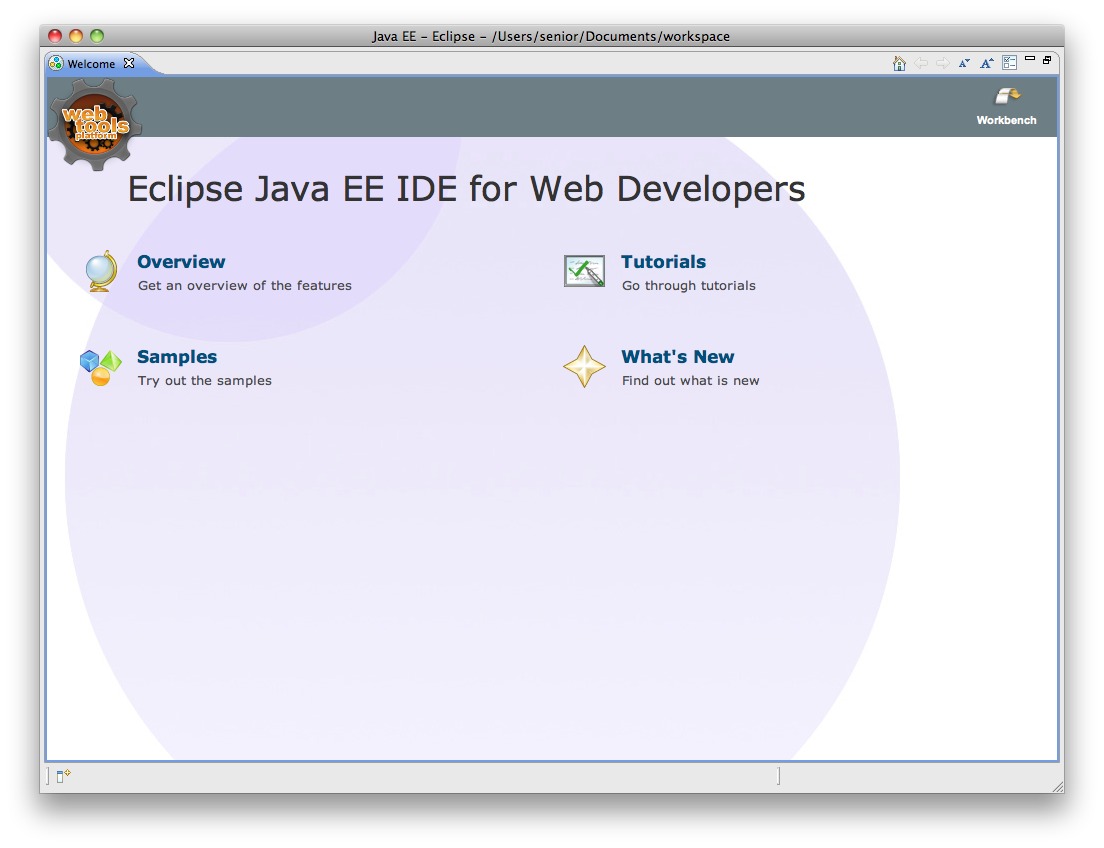
After this there is a small pane in the lower right status bar, where you can look up the Welcome screen again.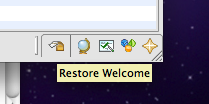
- The first window that will appear on a new installation of Eclipse is the workspace folder selection dialog. Your workspace is the folder that will contain all of your active projects along with the metadata Eclipse requires to maintain the projects.
Verify Java Version
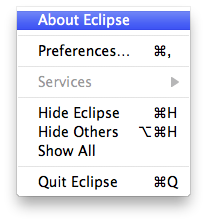
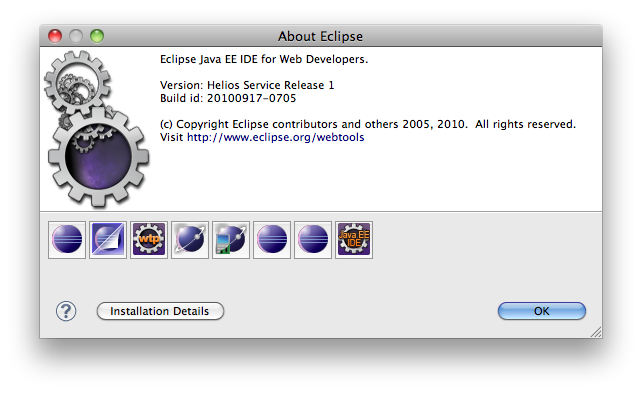
- First, let's verify that you're running Eclipse with Java 5. Go to the "Eclipse" menu, and select "About Eclipse"
- On the About dialog, click "Installation Details"
- Click "Configuration" and Scroll down until you find "java.version" and verify that it is listed as some variant of 1.5.x or 1.6.x (the exact version is not important)
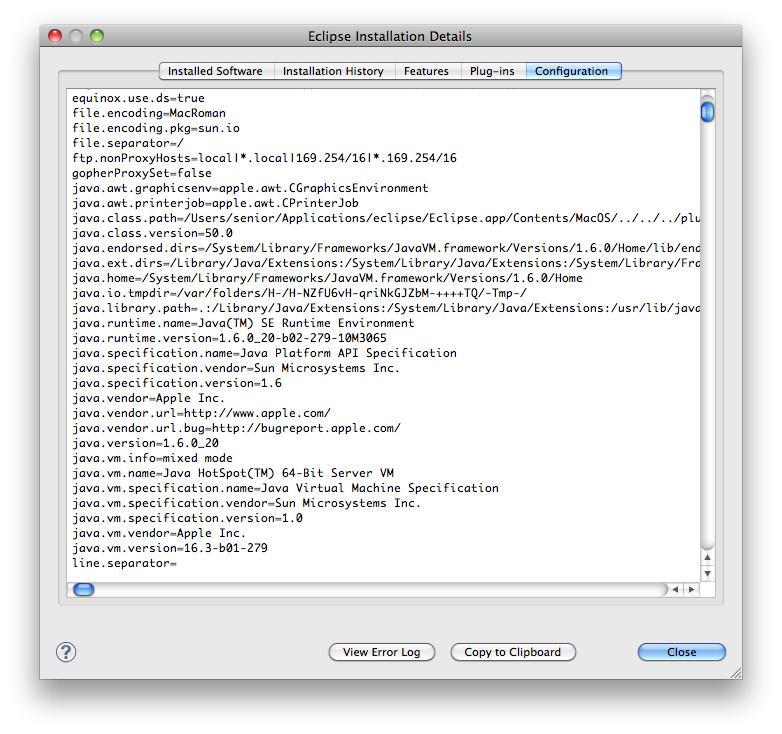
If the java.version is not 1.5.x or 1.6.x, you will need to change your default Java VM to be Java 5 (or 6) (see Apple's instructions for this), or you will need to modify the Info.plist inside the Eclipse.app to tell it to open with only Java 5 (or 6). If Eclipse is running in 1.5.x or 1.6.x then close the dialogs back out to the main Eclipse window and proceed.
- First, let's verify that you're running Eclipse with Java 5. Go to the "Eclipse" menu, and select "About Eclipse"
Install WOLips
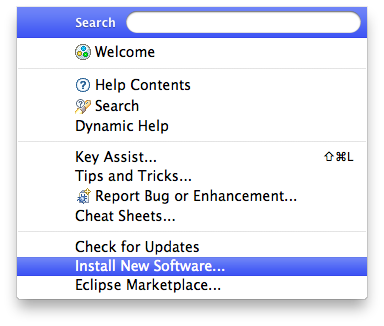
Currently you have a stock Eclipse installation which will allow you to do normal Java development, but it does not contain any of the WOLips plugins, so you will not have any of the WebObjects development tools. To begin your WOLips installation, from within Eclipse, select Help => Install New Software...
This opens the "Install" panel where you can specify sites for Eclipse to download new software features. This dialog allows you to add/inspect any software features you have downloaded or were included in your default install of Eclipse. You can click "Available Software Sites" to see what was included by default.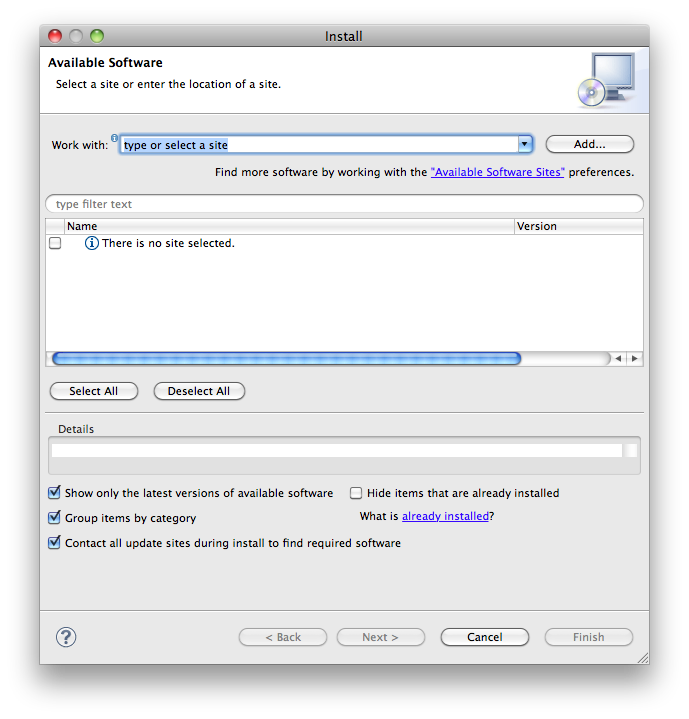
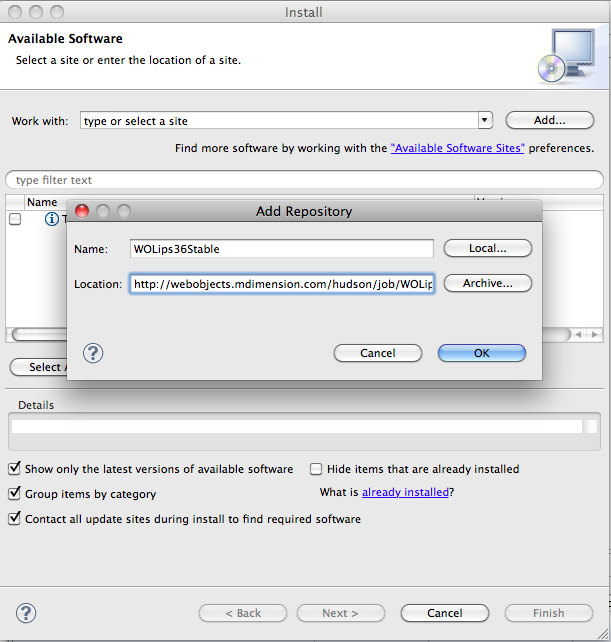
- To install WOLips you will need to add the WOLips update site to Eclipse. You do this by clicking the "Add" button. In the Name field you can enter a name for your update site. The name is arbitrary but since you could have multiple similar update sites you should give it a name that leaves no doubt about what it is.
In the Location field, enter one of the following URLs:- Current: (For Elipse 3.7) http://jenkins.wocommunity.org/job/WOLips37Stable/lastSuccessfulBuild/artifact/temp/dist/
- Current: (For Eclipse 4.4) https://jenkins.wocommunity.org/job/WOLips44/lastSuccessfulBuild/artifact/temp/dist/
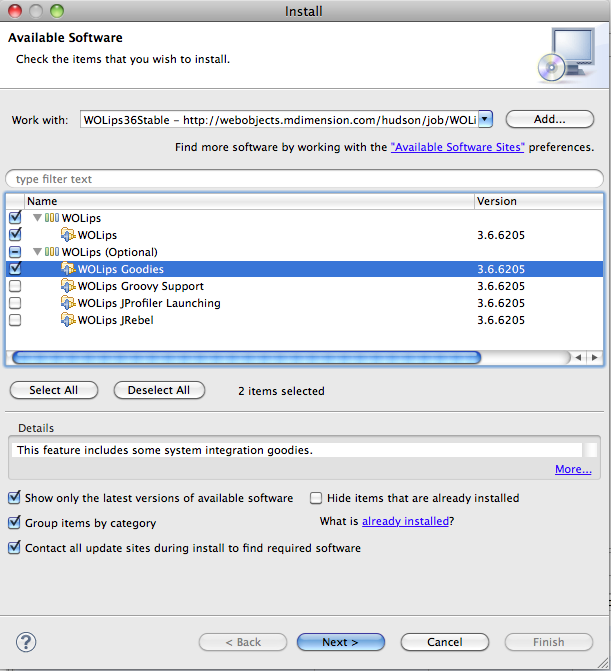
You are returned to the "Install" panel, the WOLips site having been added to the list, and fully expanded to display all its offerings.
Select features you want. If you're just getting started with WOLips you should select "WOLips" and "WOLips Goodies." Leave the other options until you are more familiar with Eclipse and WOLips and decide that you need them. (Here are some Other WOLips Install Options.) After selecting the options you want, click "Next." You'll briefly see a progress bar while Eclipse "calculates requirements and dependencies."
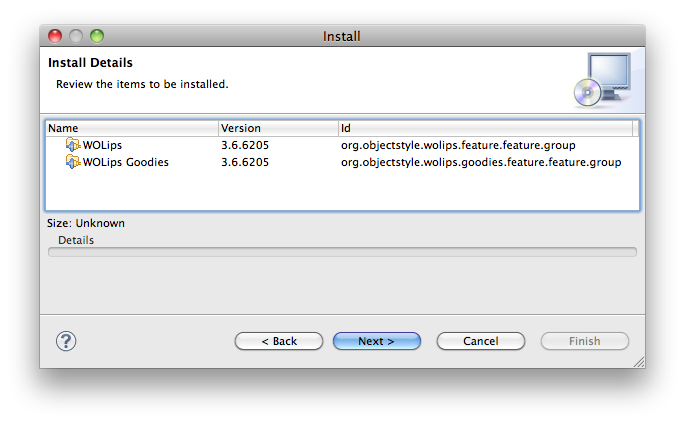
- You'll see an "Install" panel, asking you to Review and Confirm selected items to be installed.
- Click Next >. The next dialog contains the license agreements for the selected features. After reviewing the agreements (you DO review your license agreements, right?? ), select "I accept the terms of the license agreement." Selecting this radio button will accept the license agreements for all of the features listed. Click Finish to continue. You may also get a warning about "unsigned content." Click "OK" to dismiss that dialog and continue the install.

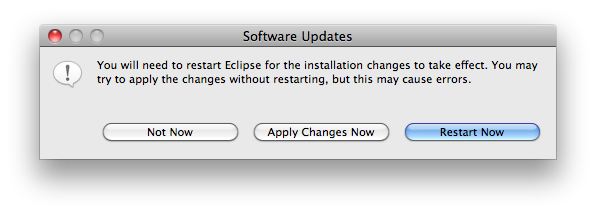
- Eclipse will now download and install all the selected features and plugins. When it has completed, it will prompt you to restart Eclipse. Select "Restart Now."
- To install WOLips you will need to add the WOLips update site to Eclipse. You do this by clicking the "Add" button. In the Name field you can enter a name for your update site. The name is arbitrary but since you could have multiple similar update sites you should give it a name that leaves no doubt about what it is.
Done!
That's it! You now have all of the WOLips features installed in your Eclipse. Continue to the Create a new WO Application tutorial to learn more about using WOLips' capabilities. You can also Access the WOLips User Guide or explore additional Useful Eclipse Plugins.