Using WOLips With Multiple Versions of WebObjects
The following are instructions on how to setup Eclipse / WOLips so you can work with mulitple versions of WebObjects. This tutorial will demonstrate setting up your environment simply for WebObjects 5.3.3 and 5.4.3 but there's no reason you can't have different setups based on customer or project instead.
Create New Directory Structure
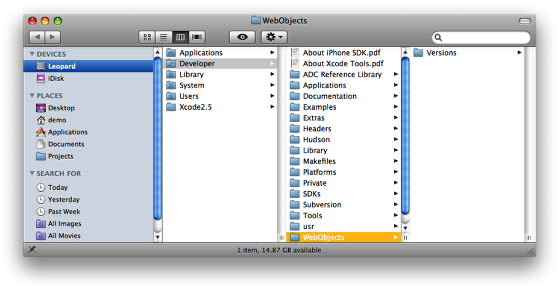
The first thing we need to do is to create a new directory structure to allow for multiple versions of WebObjects to be installed in. This new directory structure basically creates a new root level that WOLips will look in for all frameworks used by a given project or workspace. This directory structure can be anything you wish. For demonstration purposes, I'm going to create it under the /Developer directory.
Create: /Developer/WebObjects/Versions/
Download WOInstaller.jar
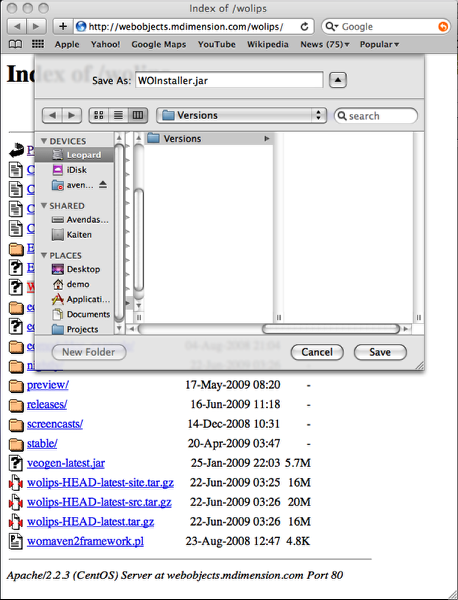
We now need to download the WOInstaller.jar file from https://jenkins.wocommunity.org/job/WOInstaller/lastSuccessfulBuild/artifact/Utilities/WOInstall/WOInstaller.jar and save it into the Versions/ directory we just created.
Use WOInstaller.jar to download WebObjects
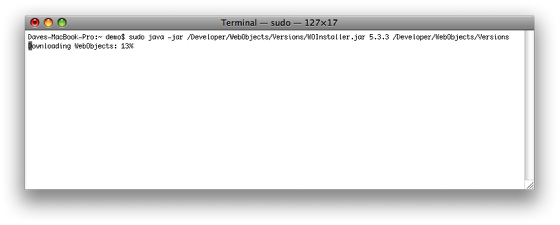
Open Terminal.app and run one of the following commands:
Unknown macro: noformat. Click on this message for details.
(depending upon which version of WebObjects you would like to download.)
Installed Versions
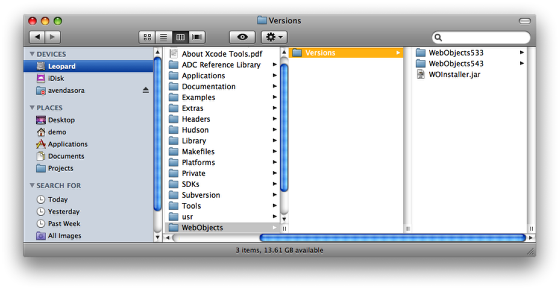
When the script has finished downloading, your directory should look something like this. At this point you could rename the directory to something like MyCustomer or MyProject. For this demonstration we'll just leave it named as is.
Open Eclipse / WOLips
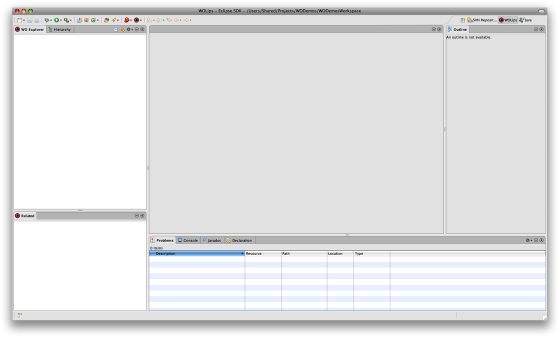
You need to launch Eclipse and WOLips at least once so that it will create the default wolips.properties file in ~/Library/Application Support/WOLips/. If you've already been using WOlips, you can skip this step.
Make a copy of the default wolips.properties file
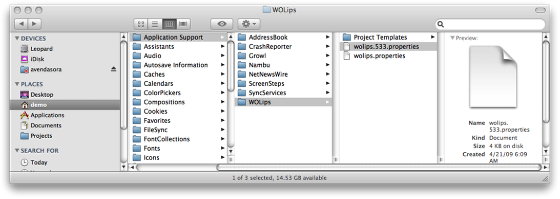
Select the wolips.properties file and make a copy of it. Then rename the copy to be wolips.yourversion.properties. In reality, you can rename it however you'd like (for example: wolips.properties.533 or 533.wolips.properties), but I find that putting the version number in the middle (e.g. wolips.533.properties) will keep all the different versions together, and will not mess with the extension mapping.
Modify your new wolips.533.properties file to point to your newly downloaded version of WebObjects
As an example, if you downloaded WebObjects 5.3.3 into /Developer/WebObjects/Versions/WebObjects533, then modify your new wolips.533.properties file as follows (substituting your username for bubba, of course):
Unknown macro: noformat. Click on this message for details.
Configure Eclipse to use your newly installed version of WebObjects
Eclipse needs to be able to reference your wolips.533.properties file, so that it can locate all the resources needed in order to build and to run your projects.
Here you have two options:
- you can set a workspace-wide preference to use a particular wolips.properties file
- you can configure an individual project to use a particular wolips.properties file
Neither approach is without its problems. Read on...
Option 1 - Configure the Eclipse workspace to reference your new wolips.properties file
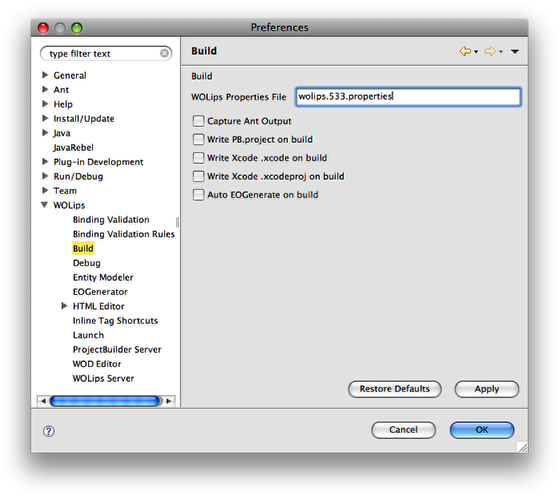
With this option, we're telling the Eclipse/WOLips internal incremental builder to reference a specific wolips.properties file for the entire workspace (rather than using the default, which is $HOME/Library/Application Support/WOLips/wolips.properties). And by doing this, we're implicitly telling Eclipse which installation of WebObjects we want it to use.
To change this setting, go to the "Eclipse" menu, select "Preferences", open the "WOLips" preference group, then select "Build". Enter the name of your new wolips.properties file. Note that this can be either an absolute or relative filename. Relative filenames are relative to your $HOME/Library/Application Support/WOLips/ directory.
Although in some cases you can get WOLips to use your new wolips.properties via a Clean/Rebuild, or by closing/reopening your project, it's probably wise to just restart Eclipse, to make sure the change is "refreshed" for all your open projects. And then a Clean/Rebuild may also be in order.
Eclipse/WOLips will also use this setting to find the referenced resources at runtime, i.e. when your run your project from within Eclipse.
Option 2 - Configure your project to reference your new wolips.properties file
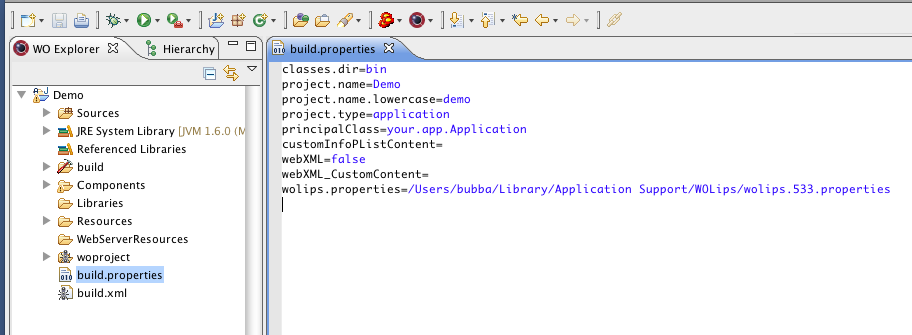
Currently, the Eclipse Ant builder is not controlled by the "WOLips -> Build" setting in Eclipse's Preferences. In order to build with Ant, you first need to tell Ant where to find your WebObjects installation and other resources. Your project's default Ant buildfile, build.xml (which is created by WOLips when you create a new WebObjects application project), reads and uses the properties found in your $HOME/Library/Application Support/WOLips/wolips.properties file. But you can specify a different wolips.properties file by adding a line like the following to your project's build.properties file:
Unknown macro: noformat. Click on this message for details.
If you specify a wolips.properties setting this way, it will override the workspace-wide WOLips preference setting.
Eclipse will also use this setting to find resources at runtime, i.e. when you run your project from within Eclipse.
OPTIONAL - Building your project from the Command Line Using Ant
If you want to build your project with Ant from the command line, you need to tell Ant two things:
(1) The location of the WOLips woproject.jar file:
You can do this either via the -lib parameter to the ant command, e.g.
Unknown macro: noformat. Click on this message for details.
or by putting a copy of woproject.jar someplace where Ant will find it. A convenient location for it is your $HOME/.ant/lib folder:
Unknown macro: noformat. Click on this message for details.
(2) The location of your wolips.properties file:
If you already specified this in your build.properties (as per Option 2, above), then you're done. But perhaps you have no interest in building with Ant from within Eclipse, but only want to be able to do Ant builds from the command line. If that's the case, then you can use Ant's -D<property>=<value> command line option to set the value of the wolips.properties Ant property to be the path to your wolips.properties file. Ant will read and process the file specified by the wolips.properties property during the course of processing your build.xml. Again, this path specification can be absolute or relative; but if it's relative, Ant will interpret it as being relative to your project's base folder.
Example:
Unknown macro: noformat. Click on this message for details.
As above, you cannot use a tilde character as an abbreviation for your home directory (but you in fact could use an environment variable such as $HOME - the shell would expand it before passing it to ant).