Project Wonder Installation
This page is the starting point for beginning development with Project Wonder. Developing rich web applications with Project Wonder requires the installation of three primary components: the development environment, the WebObjects Frameworks, and the Project Wonder Frameworks. The development environment is comprised of Eclipse and WOLips, the latter being a set of plugins that provide a rich and specialized toolset for developing Wonder applications within the ubiquitous Eclipse Java IDE.
There is an alternative install guide as part of the Learning The Wonders book, which also contains the procedure to install this on Windows.
The guides here assume you are using macOS 10.13 (High Sierra) or higher. There are four sections to this installation process.
Overview of Steps:
- install Eclipse (if necessary)
- install WOLips Plugins for Eclipse
- install WebObjects frameworks and configure WOLips
- install Project Wonder and import into your workspace
Step 1: Install the latest version of Eclipse
First of all, you need a Java JDK installed. If you don't have it yet, get it from Adopt Open jdk . As of January 2020, Eclipse install fails with Java 11-DCEVM, start with Java 8 and Install Java 11 after. To install a DCEVM and Hotswapper Java 11, you download prebuild binary here and install by extracting the archive in /Library/Java/JavaVirtualMachines/.
Important hint/comment for using JDK versions > 11 LTS
WOLips / WebObjects can be used with jdk-17. However, you need to add
to the (Debug) Configurations VM arguments or my app would not compile.

Further installtion
Head over to the Eclipse Foundation and download the latest version of Eclipse IDE suitable for your OS X version.
(The last version that runs on Mac OS X 10.15 Catalina is 2023-12, 4.30.)
Run the installer and follow the process, installing "Eclipse IDE for Java Developers". We don't need the EE stuff for Wonder. After completing the install, launch Eclipse to verify it's working. Close the welcome screen.
Step 2: Install WOlips plugin and the WebObjects Framework
Install WOLips Plugin
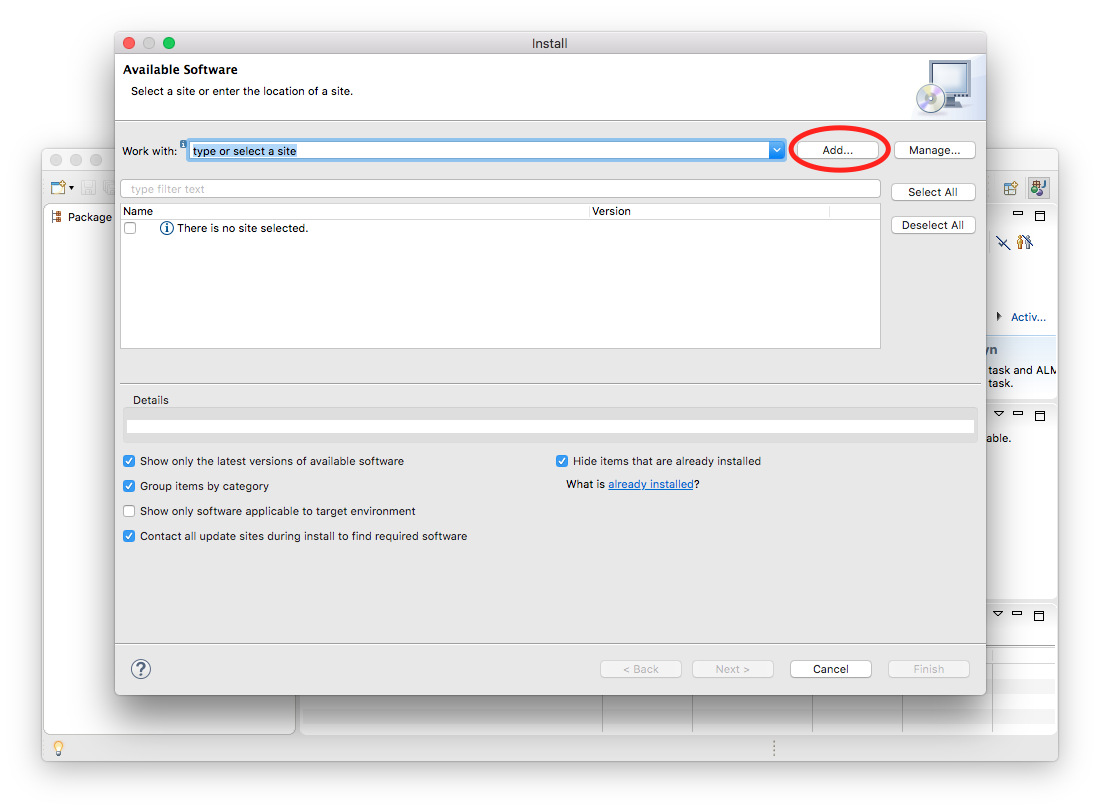
Currently you have a stock Eclipse installation which will allow you to do normal Java development, but it does not contain any of the WOLips plugins, so you will not have any of the WebObjects development tools. To begin your WOLips installation, from within Eclipse, select Help => Install New Software...

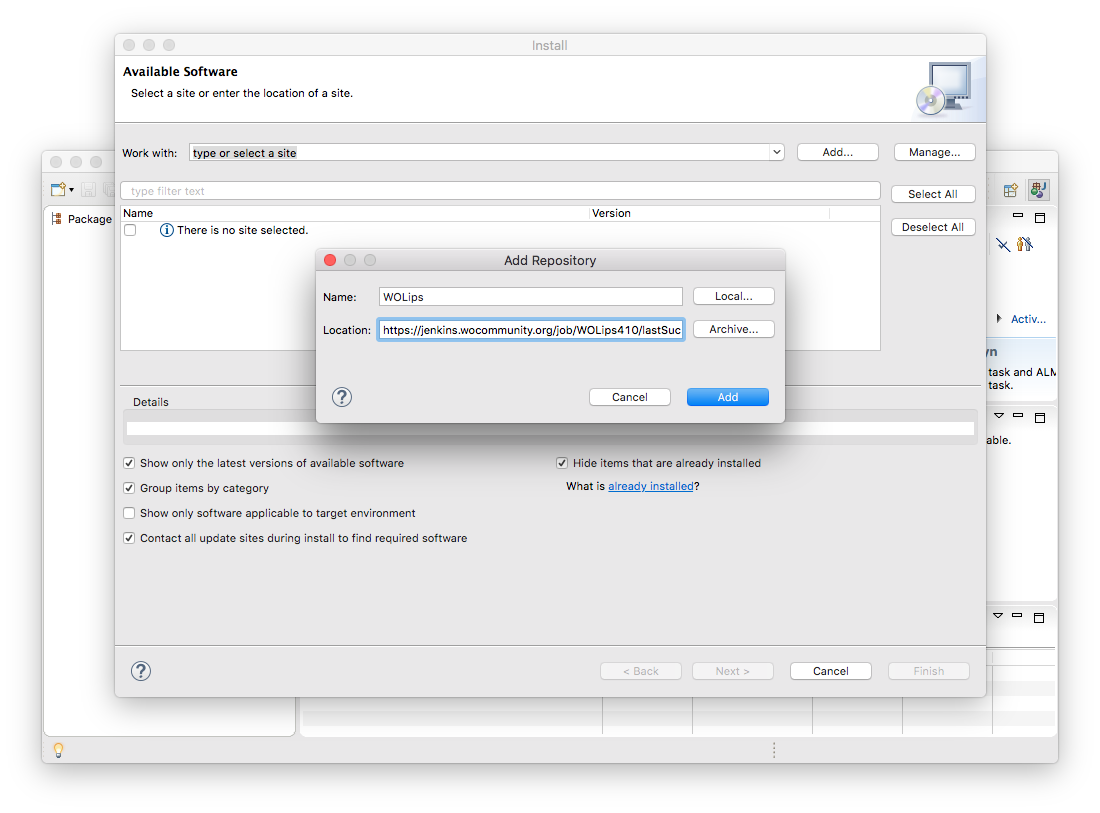
This opens the "Install" panel where you can specify sites for Eclipse to download new software features. This dialog allows you to add/inspect any software features you have downloaded or were included in your default install of Eclipse. To install WOLips you will need to add the WOLips update site to Eclipse. You do this by clicking the "Add" button. In the Name field you can enter a name for your update site. The name is arbitrary but since you could have multiple similar update sites you should give it a name that leaves no doubt about what it is.
In the Location field, enter the following URL for Eclipse 2018-12: https://jenkins.wocommunity.org/job/WOLips410/lastSuccessfulBuild/artifact/temp/dist/
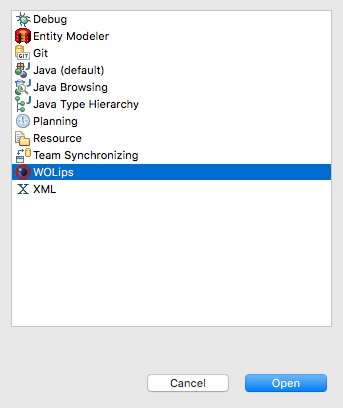
You are returned to the "Install" panel, the WOLips site having been added to the list, and fully expanded to display all its offerings. Select features you want. If you're just getting started with WOLips you should select "WOLips" and "WOLips Goodies." Leave the other options until you are more familiar with Eclipse and WOLips and decide that you need them. After selecting the options you want, click "Next." You'll briefly see a progress bar while Eclipse "calculates requirements and dependencies."

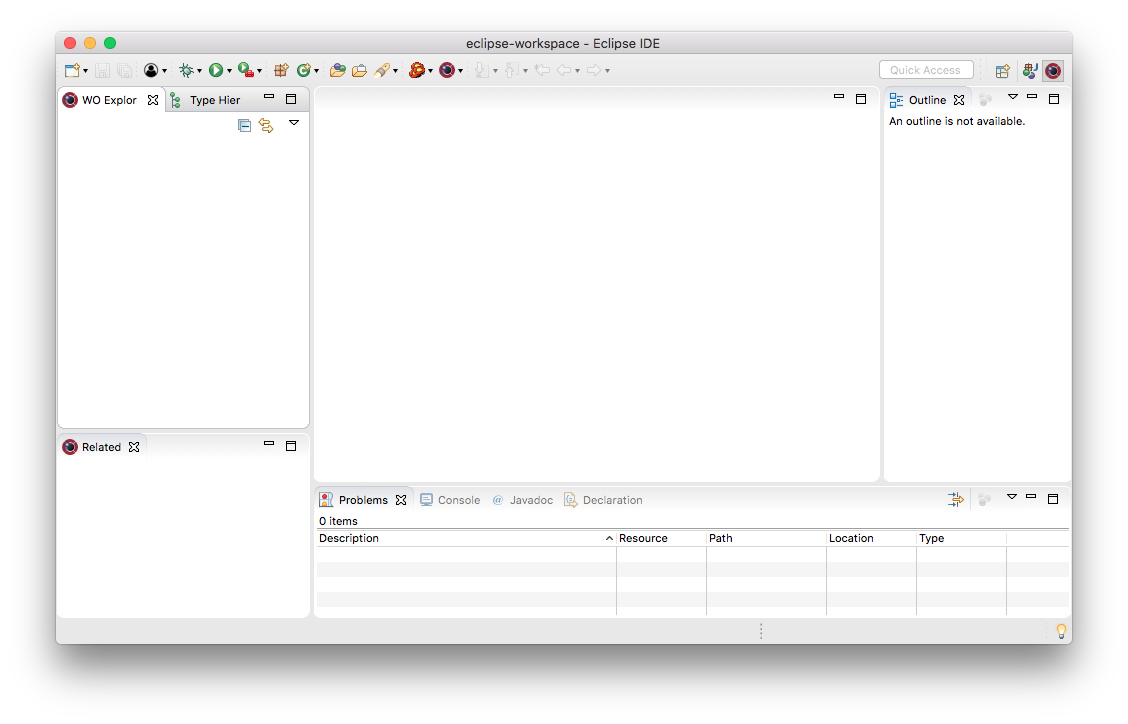
Click Next, accept the license, confirm the security check with "install anyway", and proceed. After completing the install, Eclipse will ask if it should restart itself. Please do so. After restarting, you can check if WOLips is correctly installed by calling up it's perspective via the menu Window → Perspective → Open Perspective → Other, and then choosing "WOLips". Here's how it should look:
2. Install the WebObjects Framework
Once the WOLips plugin is installed, perform the following terminal commands:
$ curl -O https://jenkins.wocommunity.org/job/WOInstaller/lastSuccessfulBuild/artifact/Utilities/WOInstall/WOInstaller.jar
$ sudo java -jar WOInstaller.jar 5.4.3 /Library/WebObjects
If you already have the WebObjects543.dmg or the automatic download does not works use this variant:
Download WebObjects543.dmg
sudo java -jar WOInstaller.jar dev54 /Library/WebObjects
Step 3: Link the Framework to WOlips through the properties configuration file
This is the most intricate step in the installation process. The configuration file found in the WOlips preferences must correctly reference the framework directory structure. Failure to successfully complete this step will result in broken libraries.
Running the script from step 2 installs the WO framework to the /Library/WebObjects directory on your system. Below is the contents for a configuration file that matches this setup. Create a new file called ~/Library/Application Support/WOLips/wolips.properties if it's not already there. Copy the code below (after modification) into that file.
wo.user.frameworks=/Users/YOUR_USER_NAME_HERE/Library/Frameworks
wo.system.frameworks=/Library/WebObjects/System/Library/Frameworks
wo.bootstrapjar=/Library/WebObjects/System/Library/WebObjects/JavaApplications/wotaskd.woa/WOBootstrap.jar
wo.network.frameworks=/Network/Library/Frameworks
wo.api.root=/Library/WebObjects/ADC%20Reference%20Library/documentation/WebObjects/Reference/API
wo.network.root=/Network
wo.extensions=/Library/WebObjects/Library/WebObjects/Extensions
wo.user.root=/Users/YOUR_USER_NAME_HERE
wo.local.frameworks=/Library/WebObjects/Library/Frameworks
wo.dir.local.library.frameworks=/Library/WebObjects/Library/Frameworks
wo.apps.root=/Library/WebObjects/Library/WebObjects/Applications
wo.local.root=/Library/WebObjects
wo.dir.user.home.library.frameworks=/Users/YOUR_USER_NAME_HERE/Library/Frameworks
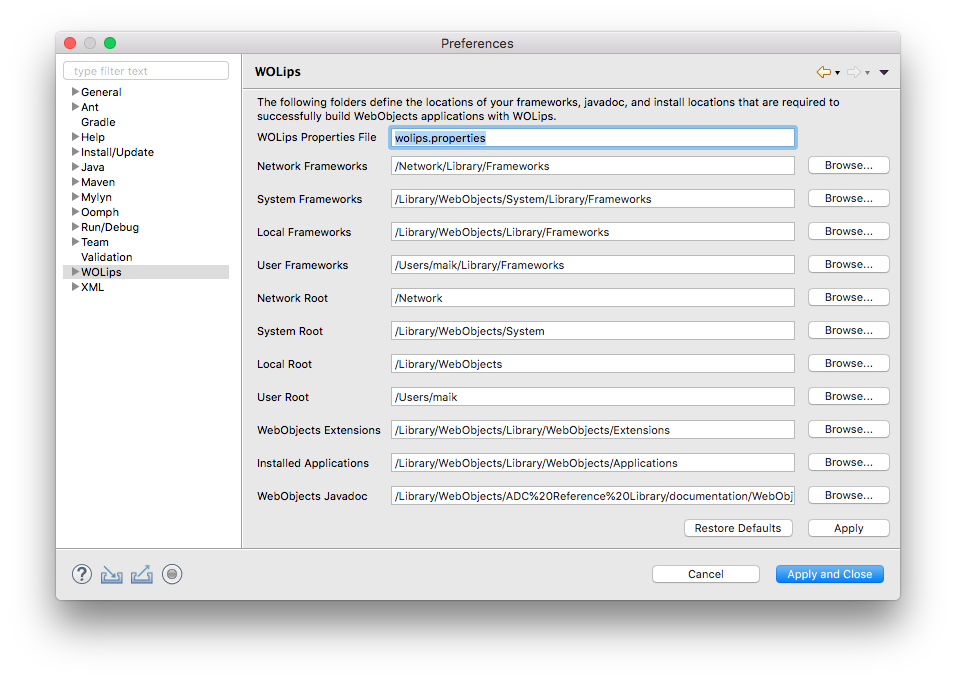
If it's not already prefilled, change the "WOlips Properties File" to wolips.properties and click OK.
At this point, you should have a functioning WebObjects platform to work with, visit <hello world link> to test your first WebObjects application.
(Please note: you can't use the Wonder Frameworks at this point as only WebObjects installed. To use the Wonder Frameworks you must successfully complete step 4 which downloads the Wonder source. You must build the frameworks with that source).
Step 4: Import Project Wonder into your Eclipse workspace
Please follow this guide: Getting the Wonder Source Code, which includes the page for Working with Wonder source in Eclipse into your Eclipse workspace.
At the end of this step, you will have Project Wonder imported into Eclipse under its own working set. If you are unfamiliar with working sets in Eclipse, the following video will help clarify. This video also demonstrates a "Hello World" project creation to validate proper installation. Note: this video is made with a much older version of Eclipse
Loading the video player...