Entity Modeler
Entity Modeler is the WOLips counterpart to the EOModeler tool from Apple. It does not have all the GUI niceness and drag and drop, but it also does not have all the long standing bugs. It has some pretty cool features too. Entity Model came to be through the incredible hard work of Mike Schrag around the time of WWDC 2006. Mike, thank you!
Create a Model
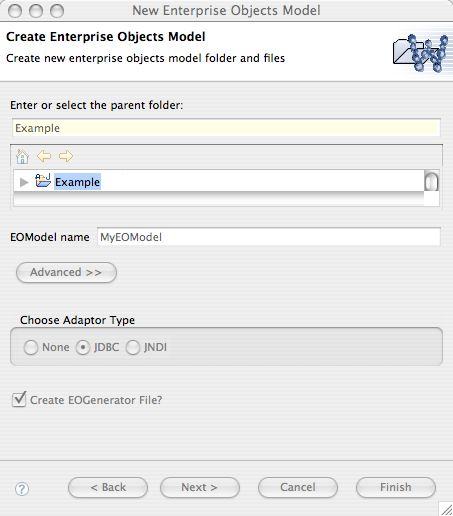
To use Entity Modeler, you will need an EOModel. If you don't already have one in your project, create one from the File - New menu, or use the New wizard. Here is what the creation dialog will look like. Give the model a name, select JDBC for the Adaptor Type (assuming you are targeting a JDBC database), and leave Create EOGenerator File? checked.
First Look
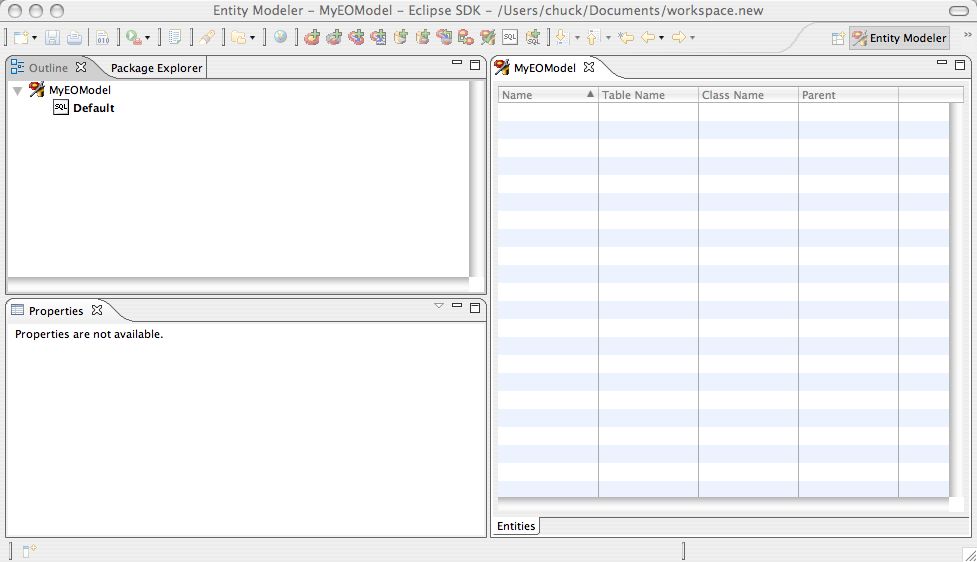
Once the model is created, you will see the initial Entity Modeler perspective:
Outline View
The Outline view takes the place of the main hierarchal display in EOModeler. This is where you will see the list of entities, SQL configurations (only Default shown so far), etc. This view is very important to Entity Modeler. The Package Explorer and Navigator are much less important. If you manage to close this view, you will need to go to Window - View and open it again before you can do much.
Properties View
The Properties view takes the place of the Inspector dialogs in EOModeler. This is were you will edit the detail of entities, attributes, relationships etc. It is blank when nothing is selected.
EOModel View
This view should be fairly familiar to users of EOModeler. There are two tabs to this display (only one of which is shown at present). One tab shows the overview of the whole model. The other tab shows a single entity.
Creating a new Entity
Click the EOModel icon in the Outline view to activate the icons and click the New Entity one:
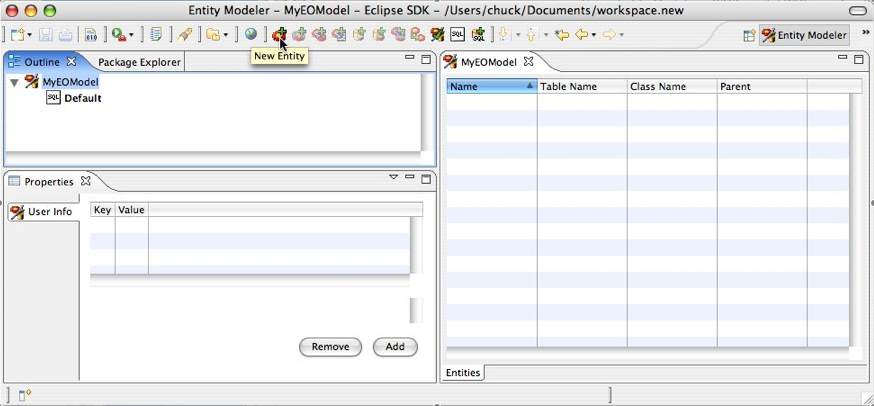
The newly created entity appears in the GUI:
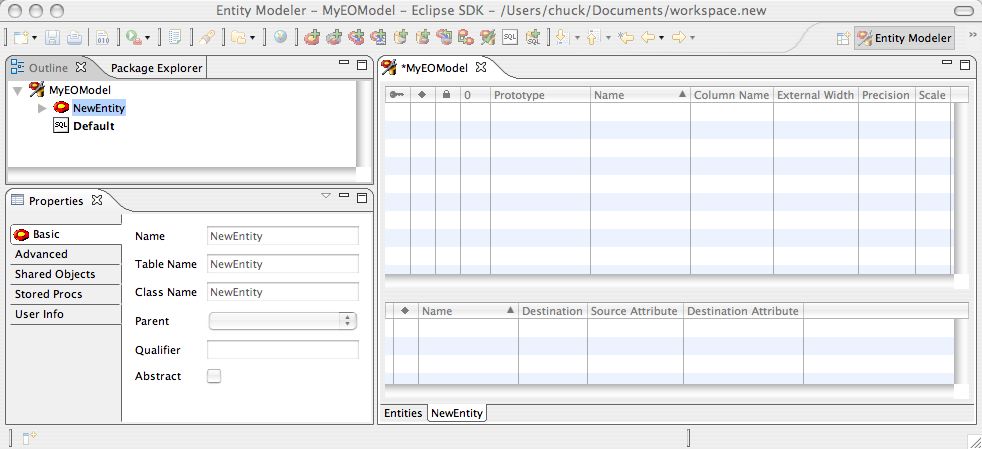
Note that the new entity is shown in the Outline view and that the EOModel now has a second tab showing the details of the entity. Use these tabs to switch between the whole model and single entity views. The Properties tab shows the details of the entity organized into tabs that match the display of EOModeler.
From here on, the functionality is much the same as EOModeler.
For information about parameters that Entity Modeler uses, such as Data Type, Value Class, Value Type, see here
Editing Fetch Specifications
Switch to Outline view and right click on your entity. Choose New Fetch Specification.
Handy Tips
- There is no right click functionality yet in Project Explorer or Entity Modeler view
- There is right click function in Outline view
- Use the Delete or Backspace key to delete items
- if the Delete key doesn't work try the fn-Delete or Shift-fn-Delete
my macBook pro required Shift-fn-Delete to remove unwanted UserInfo dictionary items.
- if the Delete key doesn't work try the fn-Delete or Shift-fn-Delete
- Double click to create a new entity, attribute, or relationship
- Click on an entity in the Outline View to see its details
- Show Views menu is not correctly populated
- If you close Properties, Reset perspective or Show View > Others... then search for Properties
Database Configurations and EOPrototypes
Entity Modeler adds the concept of Database Configurations that make it much easier to use an EOModel with multiple databases or kinds of database. This is a vast improvement over the single entry in EOModeler. It also explicitly specifies the EOPrototypes entity to use when generating SQL.
Here is an example Database Configuration:
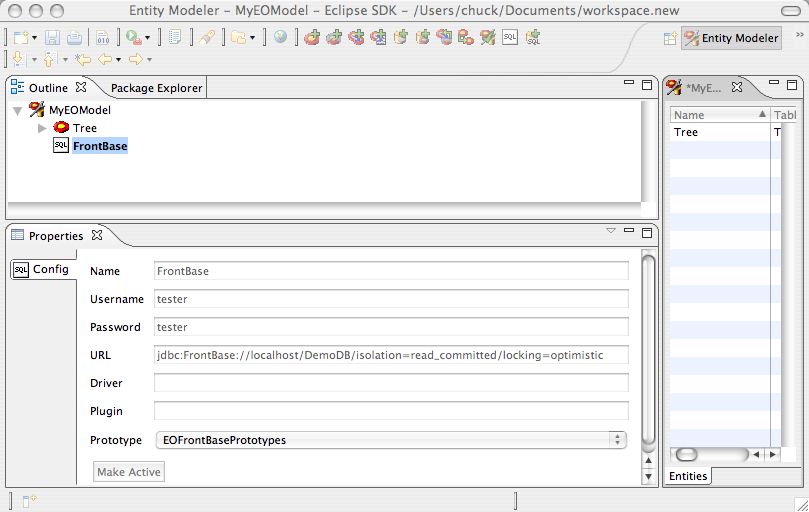
The Prototype entity is taken from other models referenced by this project. Use the New Database Config icon to add configurations for additional databases:

The active database configuration is used by Entity Modeler to:
1. Determine the database types of an attribute as shown in the properties view
2. Determine what is written out as the default connection dictionary when you save
Additionally, all of the database configurations are written out to the _EntityModeler section of the model's userInfo. If you use Project Wonder, you can then just set
modelName.DBConfigName=MySqlConfig
in Properties and it will switch out the connection dictionary and prototypes.
Only one configuration can be active at time. The other configurations will have a button to make them active:
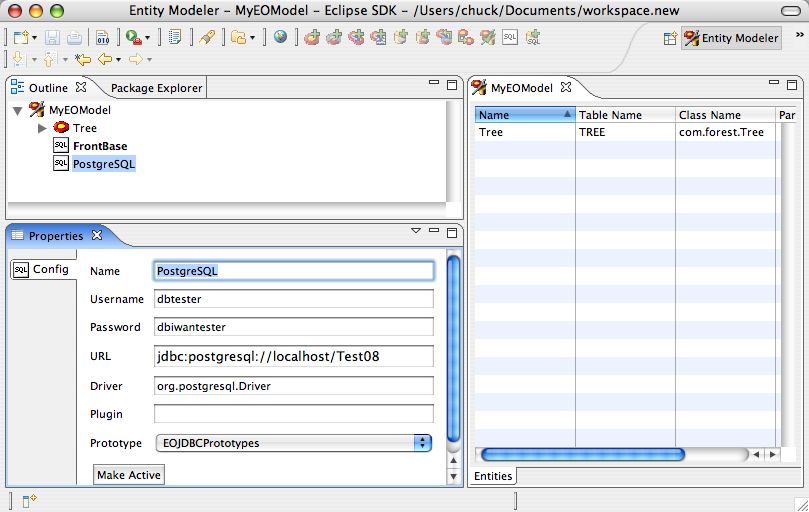
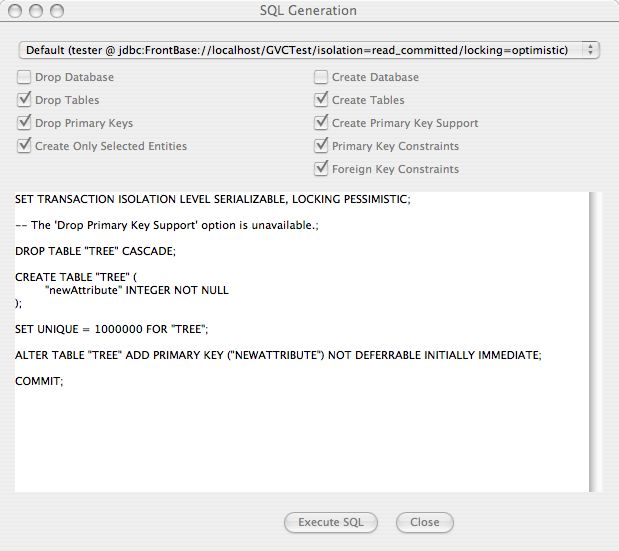
Generating SQL
Click the SQL icon to generate SQL. If there are multiple database configurations setup, there will be a pulldown menu at the top that lets you pick which configuration you want to generate for.
