Development - Beginner's Guide
Your First Project
Creating a New Project
Install WOLips
Follow the instructions here: The WOLips Installation Tutorial, to install WOLips on your machine.
Open the WOLips perspective.
From the Window menu select: Open Perspective > Other... > WOLips
Create the Project
From the File menu, select New > WebObjects Application
The New WebObjects Project Wizard
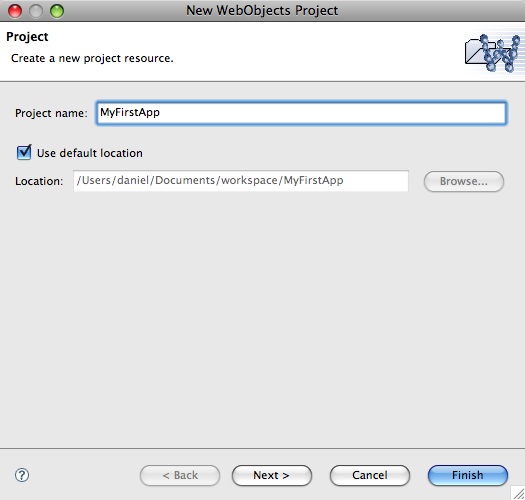
The wizard is displayed. Enter a name for your project such as MyFirstApp. Then click Next.
Figure 1-1 The New WebObjects Project Assistant
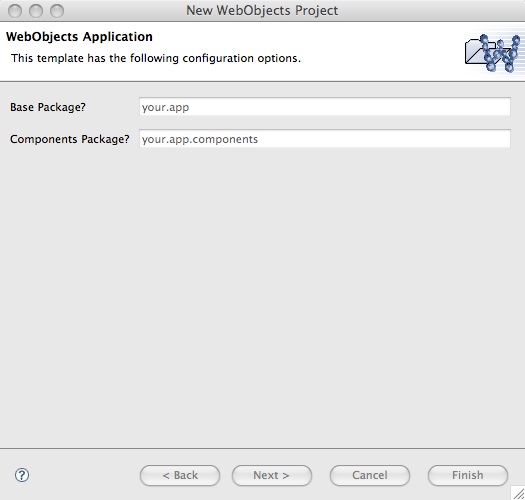
Change the default packages, if you want. In the rest of this tutorial I will refer to the packages as your.app and your.app.component. Once you are done, click Finish (you don't need to worry about the other options for now).
Figure 1-2 The New WebObjects Project Assistant
Get familiar with your project's organization
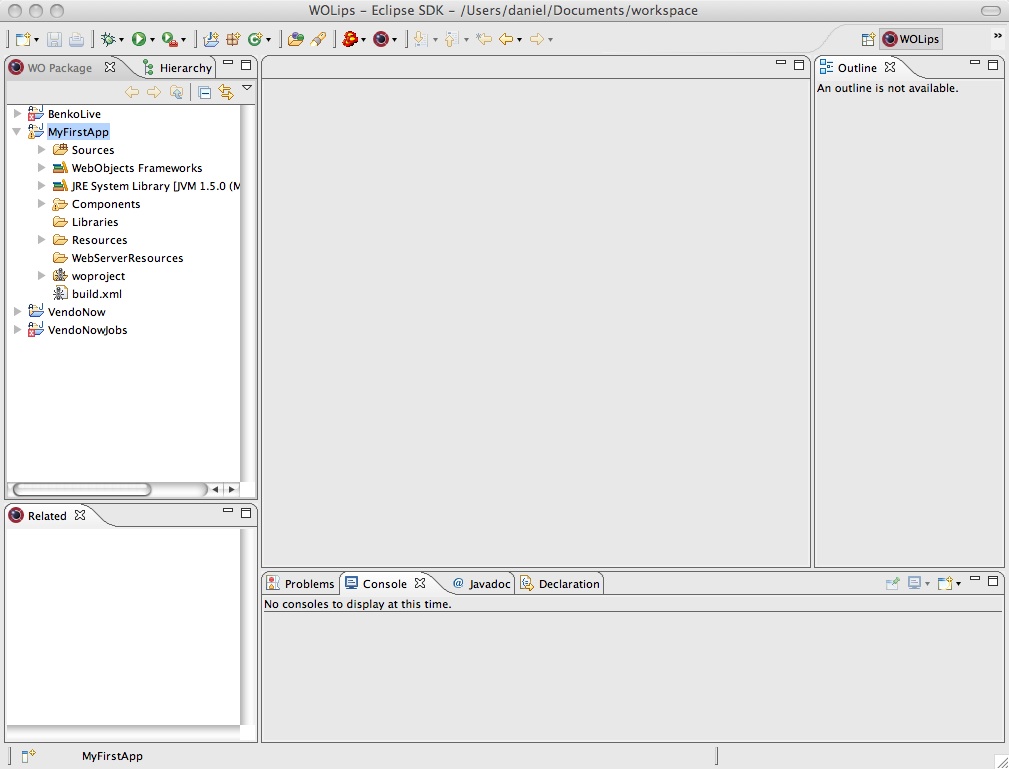
In the left pane entitled WO Package Explorer, you will see a folder icon with your applications name. Click on the triangle next to your application's folder to see the organization of your project.
Figure 1-3 The WOLips Perspective in Eclipse
Sources
This group contains initially contains two packages your.app and your.app.components. The your.app package contains .java files for the Application, Session, and DirectAction classes. You can customize your application by putting your own code in these files. You can also add other classes to your project. The your.app.components package contains the .java for the Main component that was automatically generated. Component classes are used to define the behavior of each component.
WebObjects Frameworks and JRE System Library
This group contain references to the Frameworks and Libraries necessary to run WebObjects applications. Every WebObjects application depends on at least the JavaWebObjects framework, which contains the essential code behind WebObjects. Later, we will show you how to add other Frameworks to your project for more functionality.
build
This group contains the compiled files generated by Ant and are your executable files. You should not have to go in here.
Components
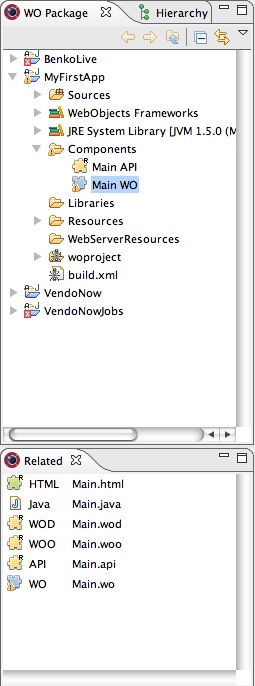
Initially, the Components group contains two files, Main API and Main WO. We will mostly concern ourselves with Main WO. When you click on Main WO, all the files (including Main API and Main.java) related to the Main component are listed in a Related tab in the lower left of your screen. All of these related files together define how your components will look and work.
Resources
This location typically stores files that your application will need at run-time. Also, Enterprise Object model files are stored here.
WebServerResources
For many reasons, you want to store static information such as graphics, sounds, and movies as well as javascript and CSS files outside the WebObjects Application in a location that the web server can access directly. Delivering these static resources directly, without your application being involved, is much faster than if WebObjects was involved; also other applications or static web pages can access the same information.
Running the Project
Without doing anything else, you have a WebObjects application ready to run. Select Run as... WOApplication by right-clicking on your Project folder or clicking on your project folder and then selecting Run from the menu bar.
After a moment a dialog window appears "Select Java Application." Select Application - your.app and then click OK. (After you do this the first time in a project, you can just click Run. It will keep track of which application you want to run.) A couple of quick moments should pass and your browser should open a new window with "Hello World".
Congratulations! You just created and run your first WebObjects Application. Cool, huh?
As a note, when you are done testing an app, make sure you stop it by clicking the red square in the console window at the bottom of the Eclipse window. If you forget and try to run the app again you may get errors.
Editing a Component
Well "Hello World" is about as boring a web page as one can make. So feel free to change it. In your project's Components window, you can edit the HTML of your component by double-clicking the component itself or it's related HTML file.
Figure 1-4 Groups, Files, & Related Files
You can even change the default editor that Eclipse uses the edit your HTML file so you can instead use the Aptana's editor if you plan on adding a lot of Javascript or and external editor such as the brilliant TextMate. In this tutorial, we will stick to the WOLips default editor so that we have instant access to the WOD file.
Figure 1-5 WOLips Component Editor
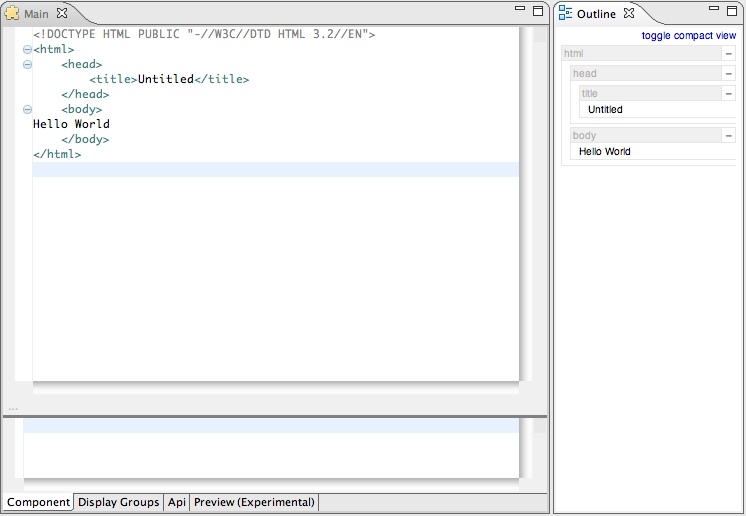
Let's Make It Dyanamic
Well, there are certainly easier ways of making static web pages and using WebObjects for that purpose would defeat the purpose of developing using WebObjects. So let's start to learn how to make our pages a little more dynamic.
A WebObjects Component
As mentioned before, the looks and functionality of a WebObjects component are defined by several files:
- HTML File. The HTML file of a component is just that, a mostly standard HTML file with <HTML> and </HTML> tags that contain HTML code. In addition to standard HTML tags and text, this is where we will also insert <webobjects> tags indicating where our dynamic elements will go.
- WOD File. The WOD file contains the bindings that tie the component's HTML code to the component's Java code. The bindings contains methods from the Java class and parameters that control appearance and functionality of the element.
- Java file. A Java class file is associated with each component. It provides the basic functionality of the component as well as any custom functions you might add.
- API File.
- WOO File.
XCode's one redeeming feature regarding WebObjects was the WebObjects Builder. It allowed, in my opinion, the developer to quickly "wire-up" the HTML file. While editing, the HTML file, you could easily access methods and variables in the related Java file including the getter and setter methods, and quickly bind them to the component in the HTML document by clicking and dragging. In WOLips, this must all be done a bit more manually. As of OS X 10.5, WOBuilder is longer supported, but there is a movement to get an WOBuilder replacement project started.
The Main Component
Every WebObjects application includes a Main component by default. The HTML file is mostly empty except for "Hello World." Likewise, the Java file contains very little. We will learn how to add methods and variables to the component.
Adding Methods
Let's start by editing the Main.java file.
- Click on the Main WO component and then double-click the related Main.java file.
Figure 2-1 Main.java in the Eclipse Java Editor
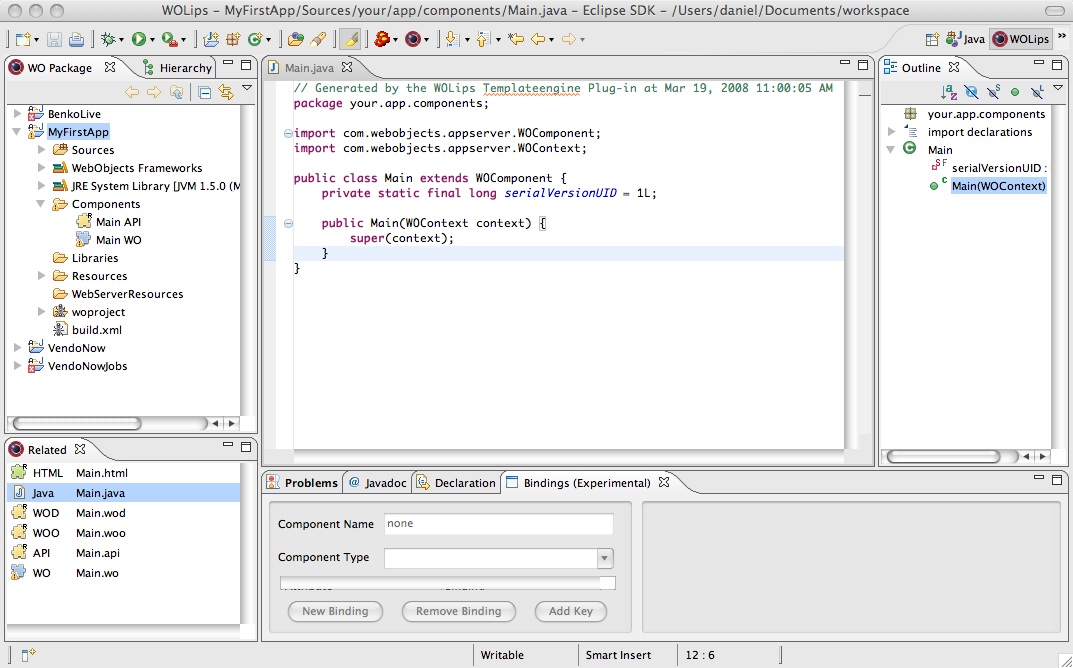
Figure 2-2 The Eclipse Toolbar with WOLips installed

Figure 2-3 The Commands Associated with Component Icons
(You can find this list by clicking on Edit->Insert->)
![]()